

Last time we talked about different types of measuring devices available at the hardware store to help with your projects. That covered only half the picture, Having a measuring tape is great, but you still have to know how to use it. This requires knowing how to set up the tape, and how to read it.
We’ll cover measuring tapes and rules first. Measuring tapes are used by pulling them out to the required length and lining the end up with one end of what you need to measure. All tapes have a hook on the end to keep them from rewinding all the way back into the case, where you can’t get them out again. But handy-handy, this hook provides more functions. First it can be used as an anchor to hook the end of the tape on the edge of what you need to measure, Second, the hook has a slot in it so you can hook the end over a screw on nail temporarily put in where you need to start measuring if there is no handy edge there. The slot also comes in handy to hook on the corner of a piece of sheet metal if you are measuring it diagonally to see if it is square. Then you just need to see what marking on the tape lines up with where the other end is. If you are measuring to an inside corner, most tape housings are marked with how wide they are, such as “Add two inches for inside measurement.” so just add the required amount to your number.
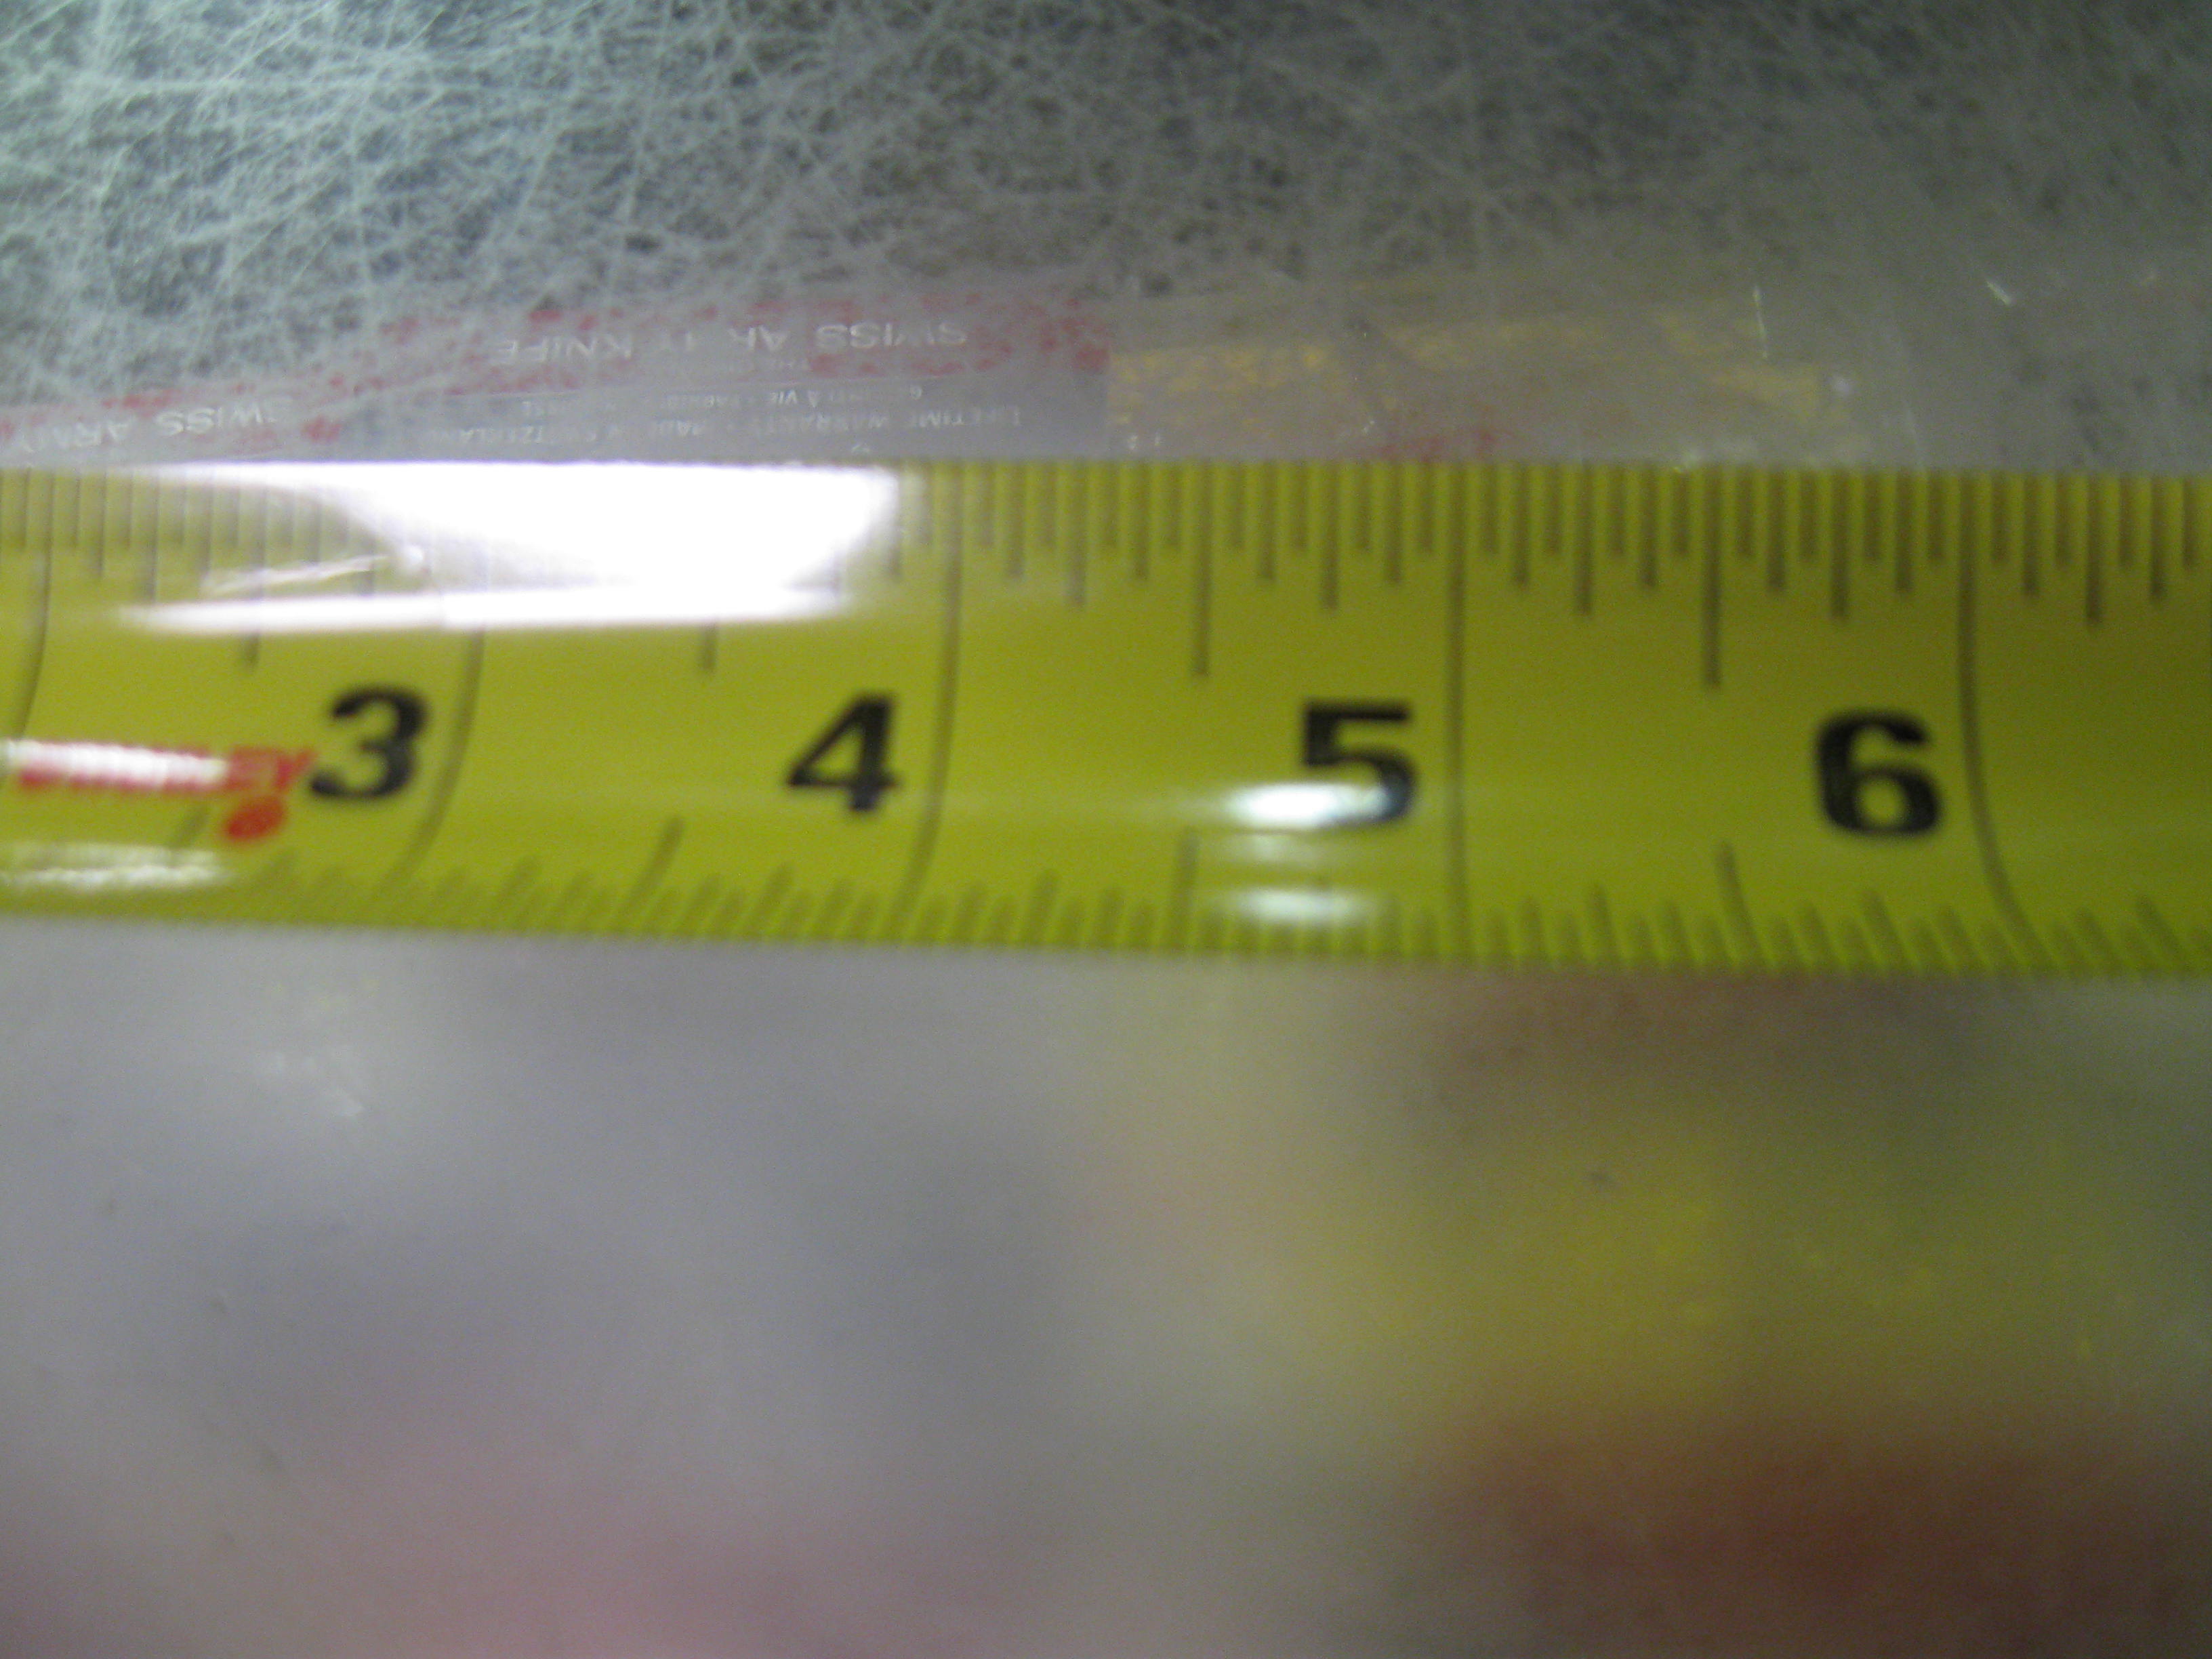
Reading the fractions of an inch on the tape seems to mystify some people, as they get their halves, quarters, etc. mixed up. I always start in the middle with the longest graduation, that is one-half. Then go in the direction that you need to go, the next longest mark is one-quarter, then one-eight, one-sixteenth and one-thirty second. Just count the graduations after the last whole inch and add them to your length.
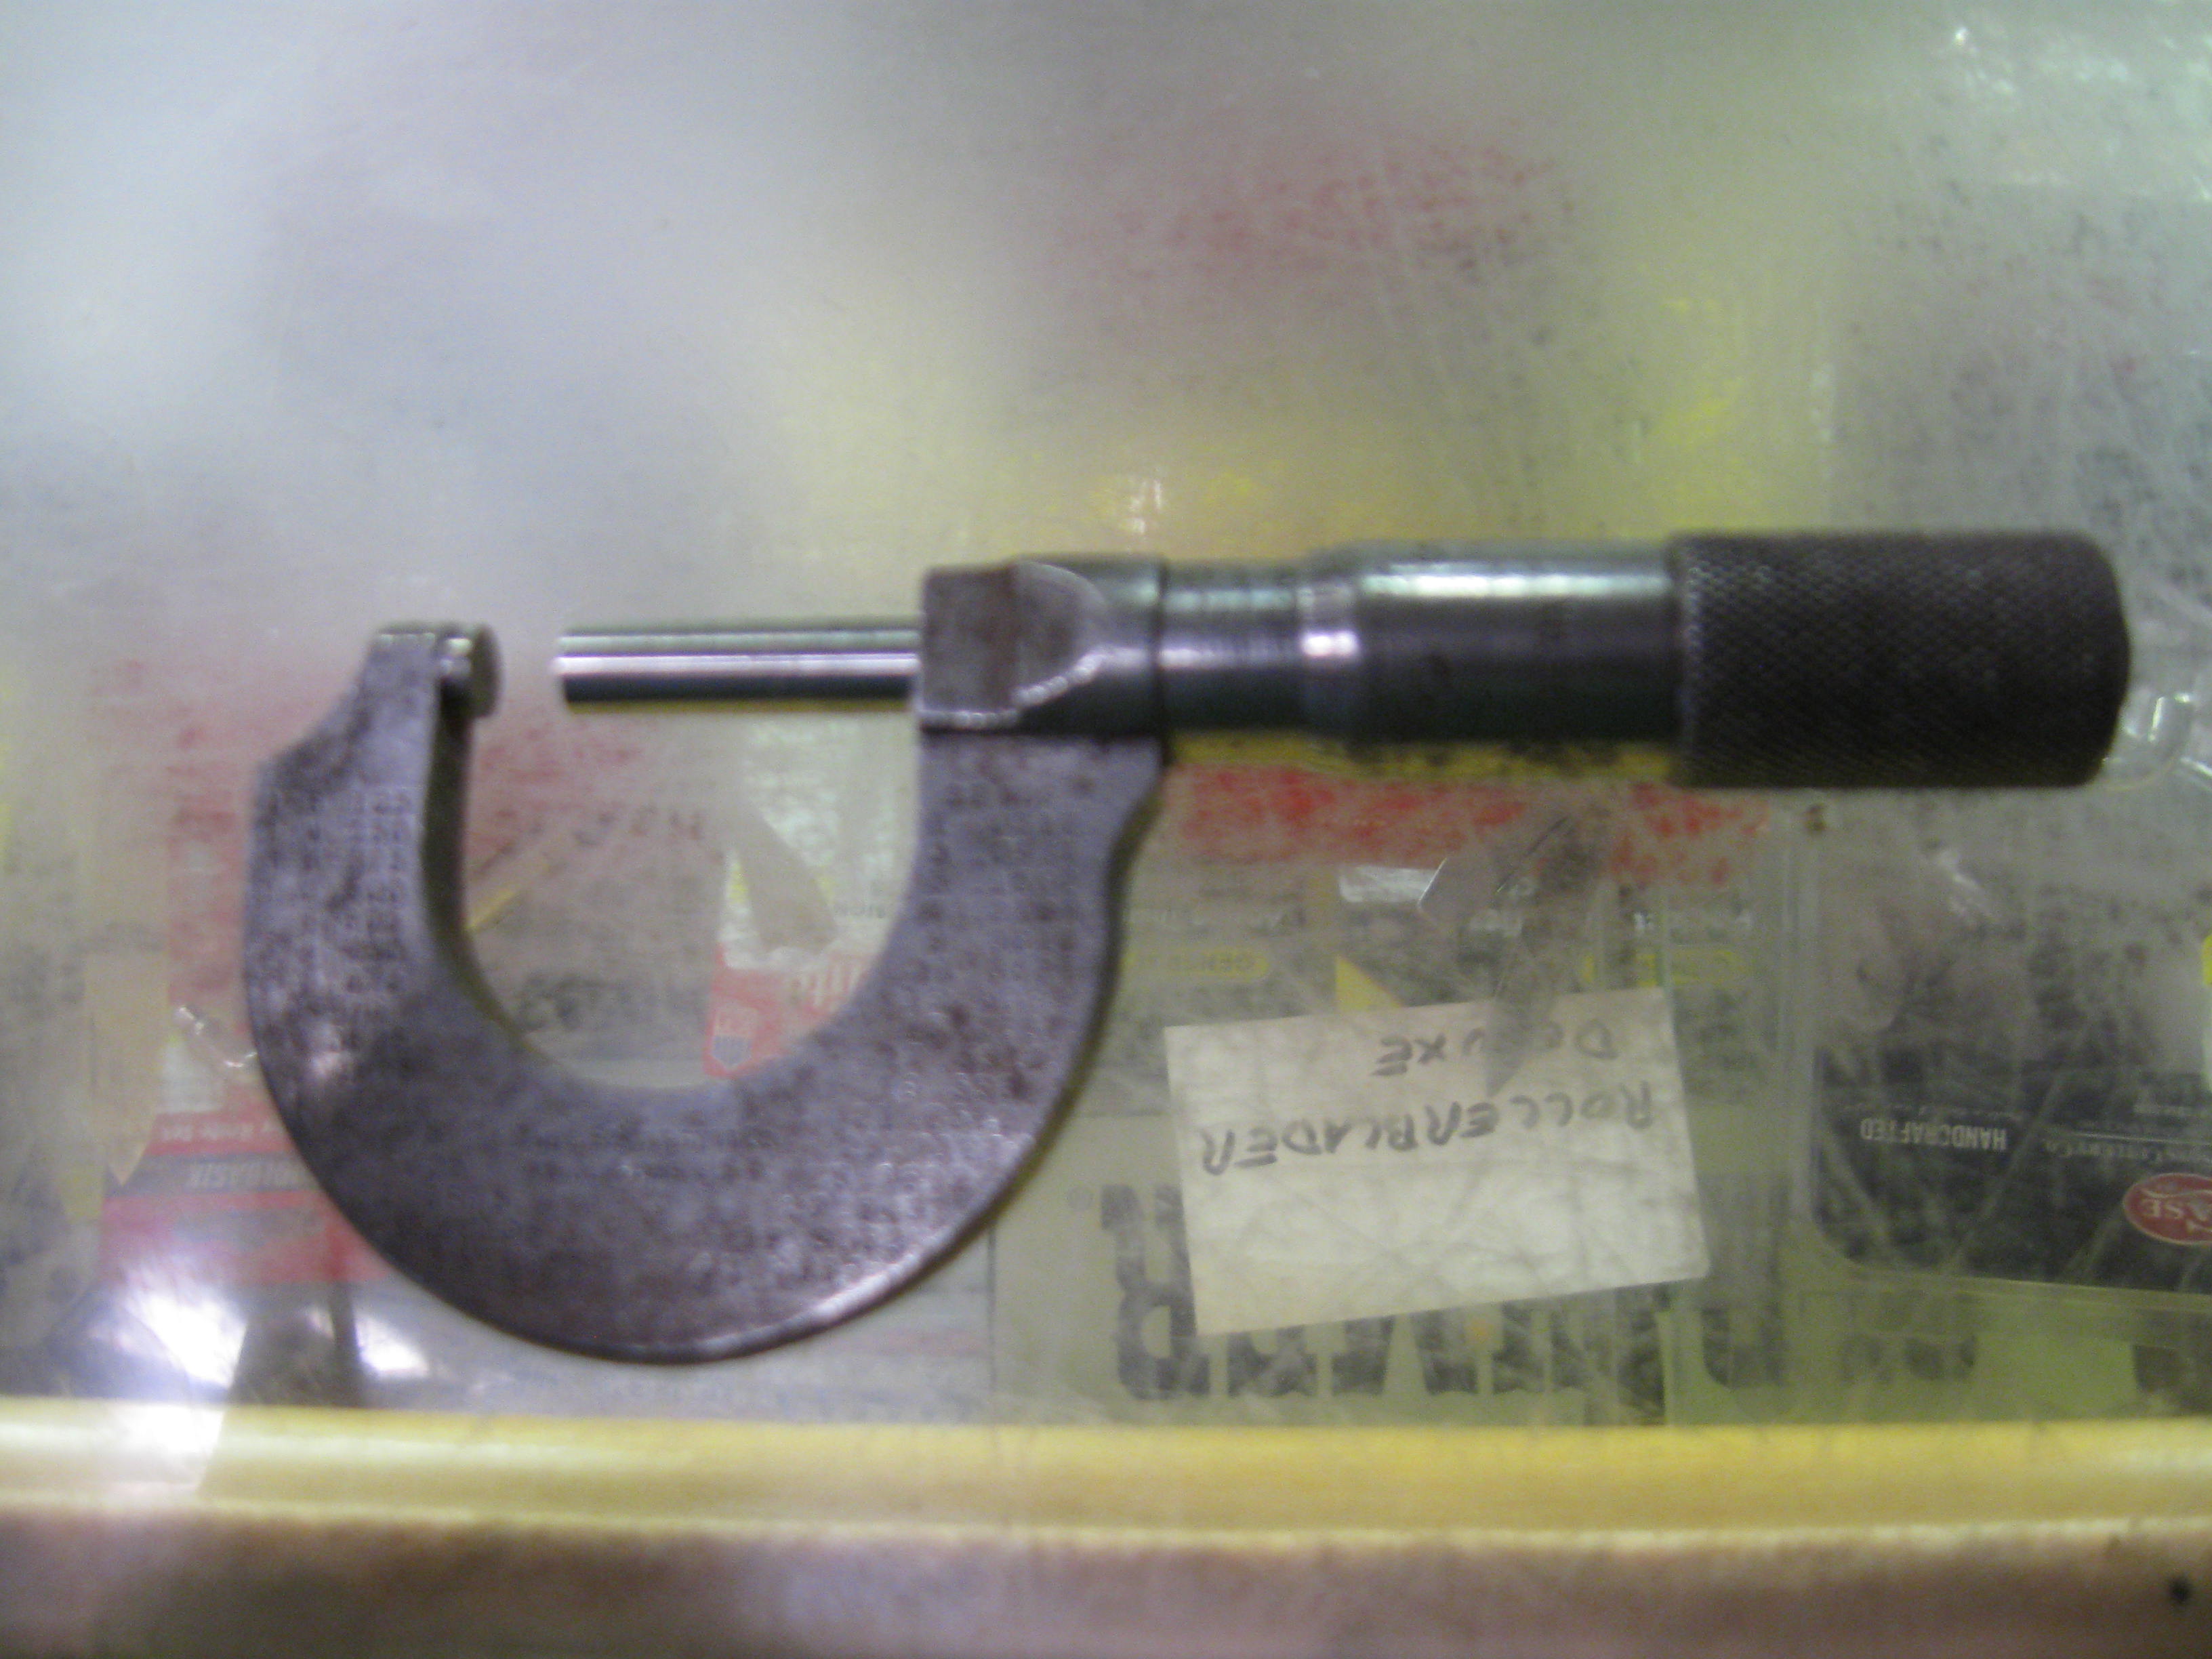
Reading a micrometer is a little more complicated unless it happens to be digital. Digital mics give you the number directly in thousandths of an inch right on a electronic or mechanical readout. Old-style mics have to be read on the markings on the mic’s barrel. To use a mic, turn it until it loosely slides over the part that you need to measure. Remember it’s not a C-clamp. Then look at the barrel of the mic. The first number is the tenths of an inch, marked on the scale, such as .2. then look at how many full marks are showing past the last full tenth. These marks are worth 25 thousandths of an inch each, so if you can see two, that’s 50 thousands. Then look to see which number on the turning part of the mic (the thimble) lines up with the measuring line, there are 25 marks on the thimble, marked every 5 thousandths. Let’s say you see 12. Then you add up all the numbers that you have to get the reading. In our example that is 2 tenths, 50 thousands, and then 12 thousandths more, that equals .262. Not too hard once you’ve done it a few times, but definitely not as easy as a digital.

A couple of other handy measuring tools also came to mind since last time. One is an angle measuring device known as a protractor. It’s like the little plastic half-circle that you had in your pencil case in grade school, that you didn’t know how to use. The fancy one at the store is a metal square, with a swinging bar that you can lock at the correct angle and then read the numbers off the plate. Angles are measure in degrees, and there are 90 degrees in a right angle, but don’ let that intimidate you, often you won’t want to know the actual measurement, you’ll just want to transfer the angle to another piece of wood.
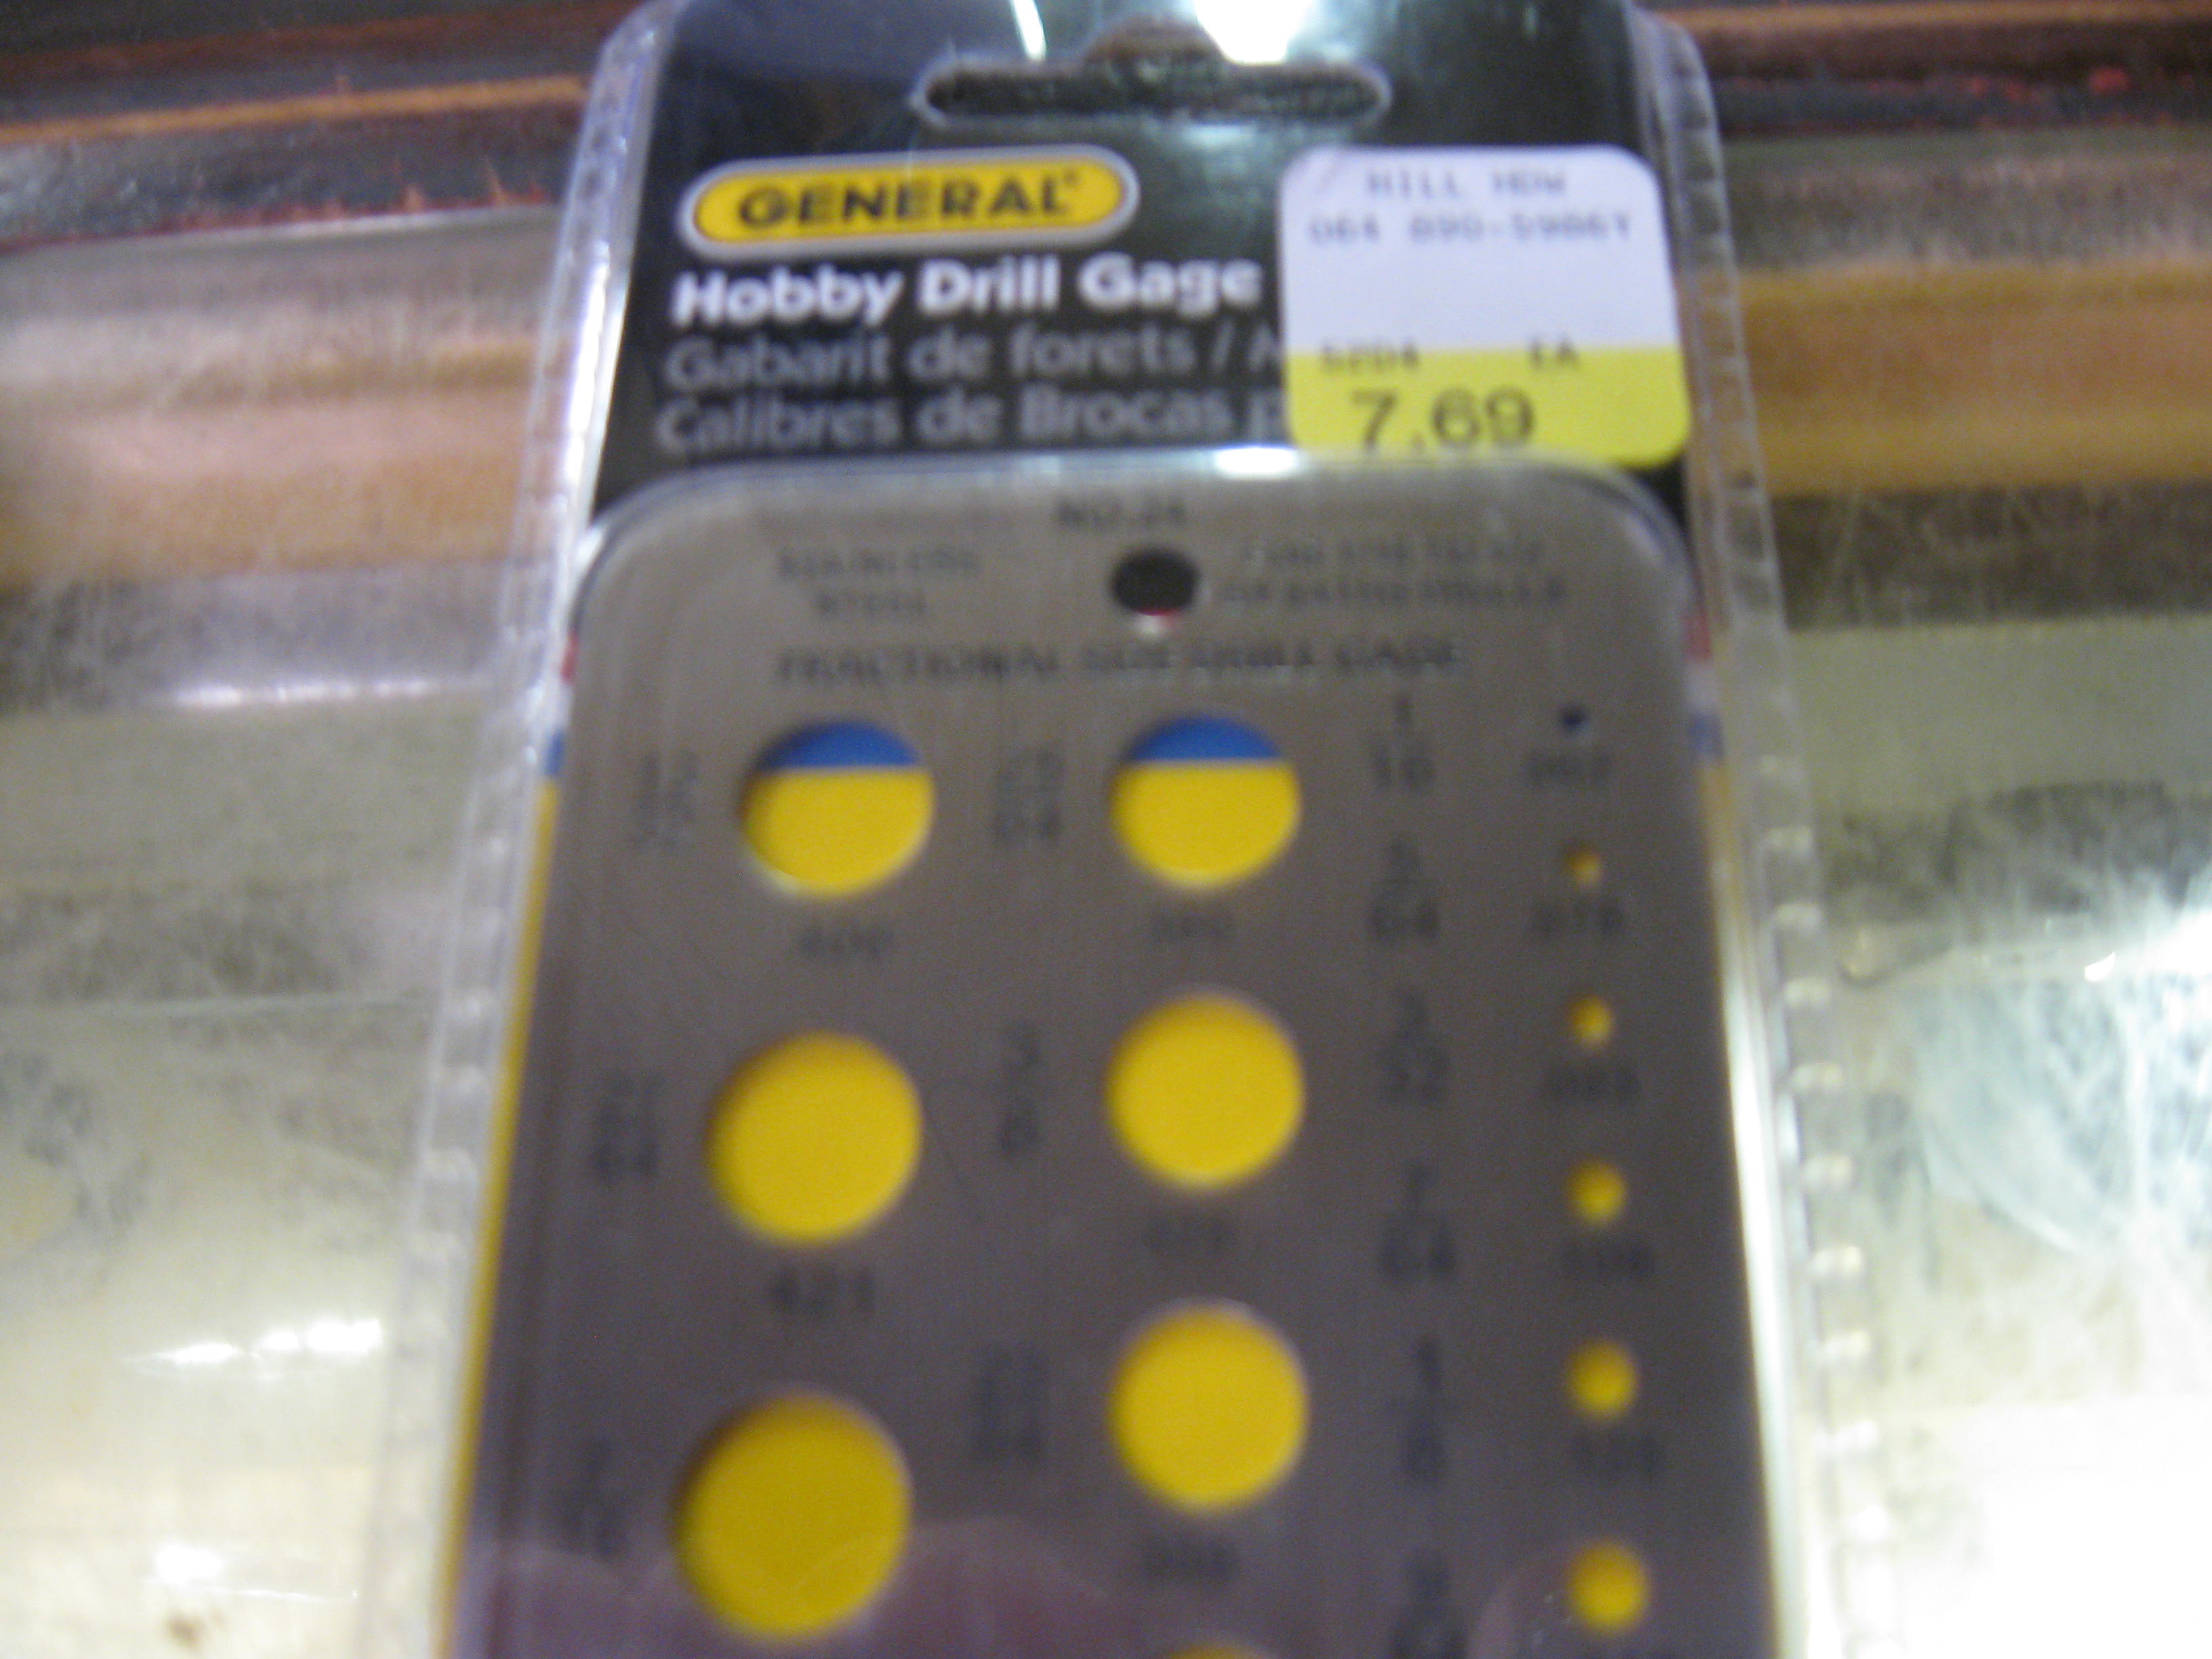
The last measuring device is another handy one, it is a drill gauge. A drill gauge is just a piece of metal or plastic that has holes in it to fit different size drills. The size of each hole is marked next to the hole. Why would you need this when all drills are marked as to their size on their shank? If your drills get as much use as mine, you know that these size markings often become difficult to read, or are wiped off entirely the first time the drill bit slips in the chuck. With the bit gauge, you can figure out what drill bit you have, or at least what size the broken stub you have left is, so you can go down and get a new one, at the Old Hardware Store…